Last week, we saw an overview of four system processes that Azure DevOps provides out of the box
No two organizations are the same and no two departments are the same when it comes to processes
even though at a high level the processes may look the same, under the hood each organization/department will have its own variant of the processes
We will see how we can customize the processes in Azure DevOps based on the organizational needs
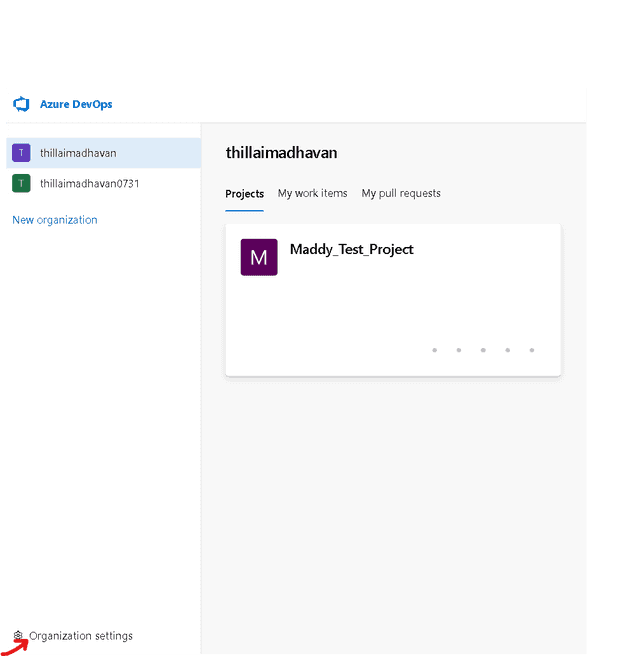
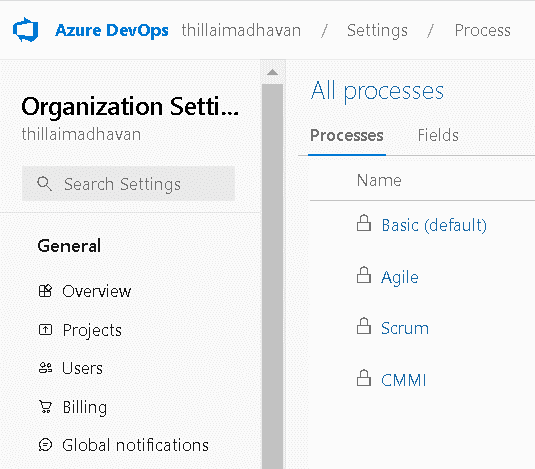
To view the processes, click on "Organization settings" and then "Process"
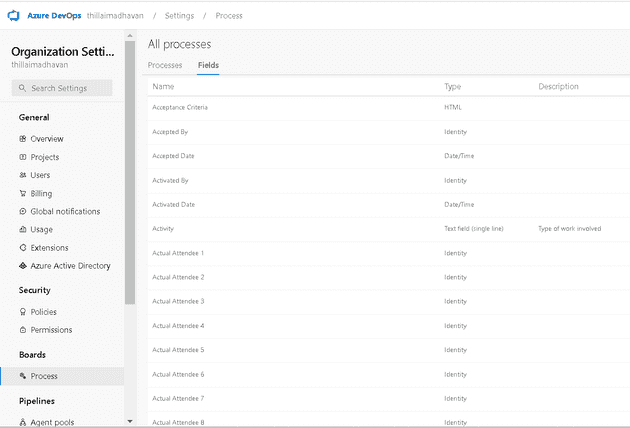
The Processes tab has the list of system processes and the Fields tab provides the complete list of workitems that are available across all the processes
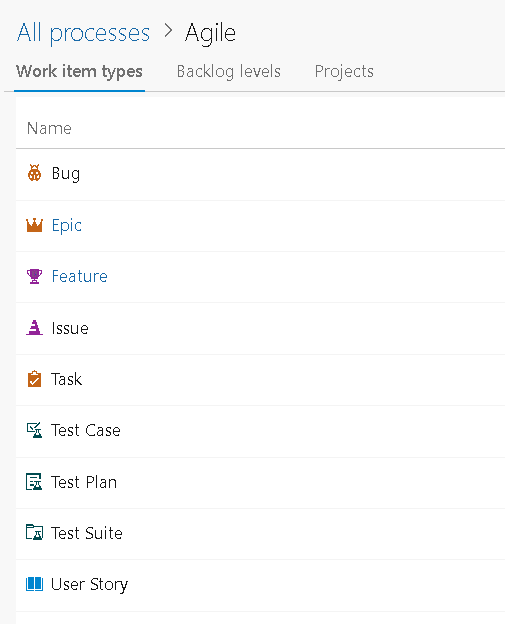
Click on the "Agile" process
Click on the "Epic"
The process tab for all the work item types will contain the following two tabs "Layout" and "States"
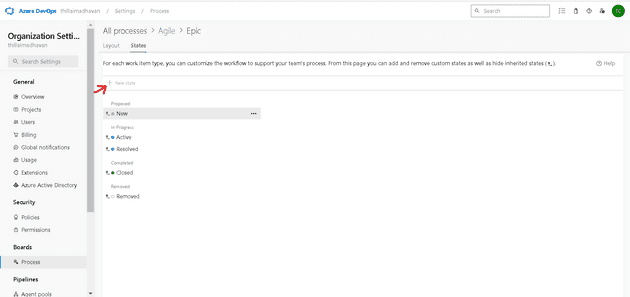
Let's say we want to add a new state called "On-Hold" to the Epic workitem type, we cannot do that in the system process
Notice that the "New state" option is grayed out
we will now create an Inherited process to be able to add new fields
Inherited process:
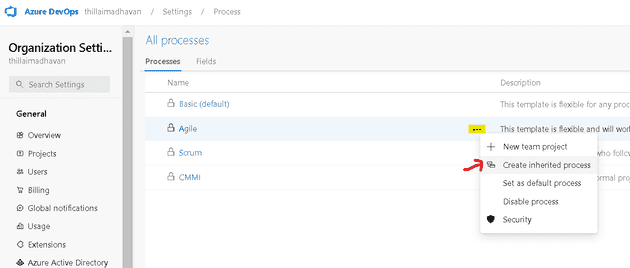
Click on "Create inherited process" option from the processes screen
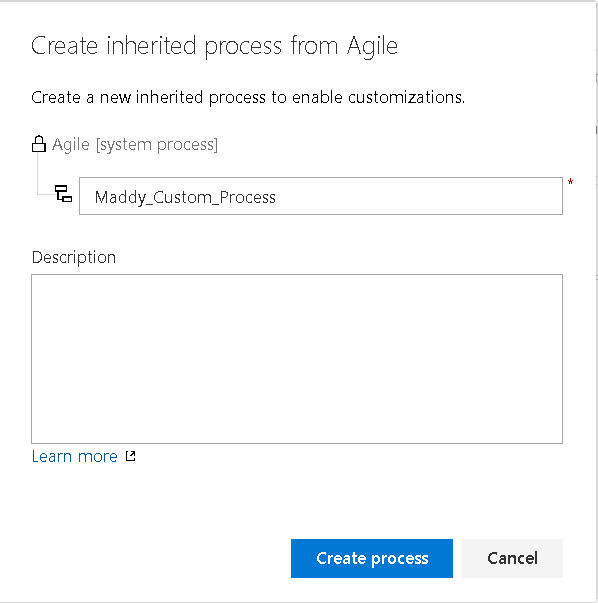
Supply a name and an optional description for the inherited process
Customize the States:
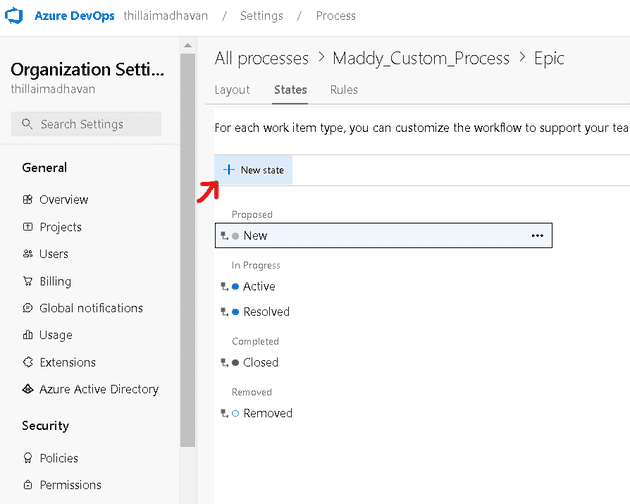
Click on the "Epic" and then navigate to the "States" tab
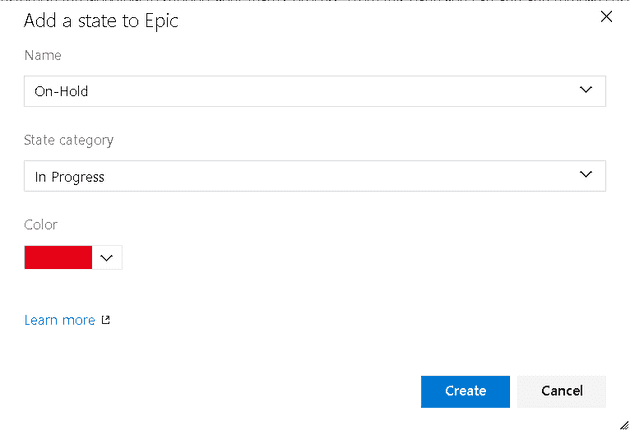
Click on the "New state" button
Name it "On-Hold", select a suitable category and a color
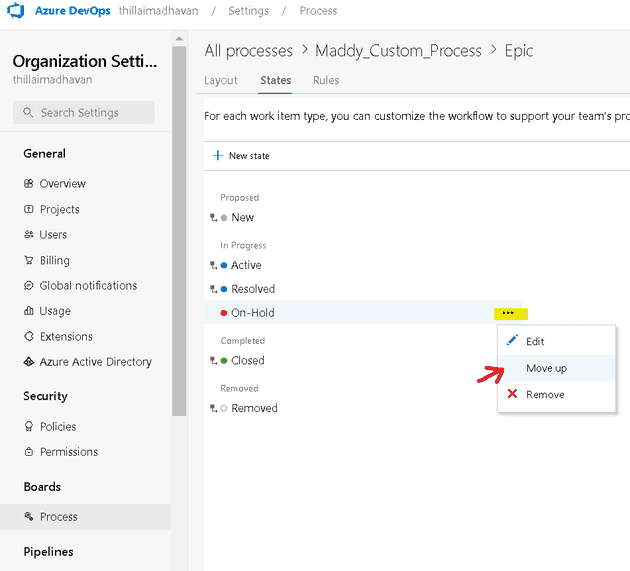
when we start working on an Epic, we will change its state to "Active" and due to some reason if we need to stop the work in this Epic we need to put that "On-Hold"
So lets move the On-Hold state to an appropriate position
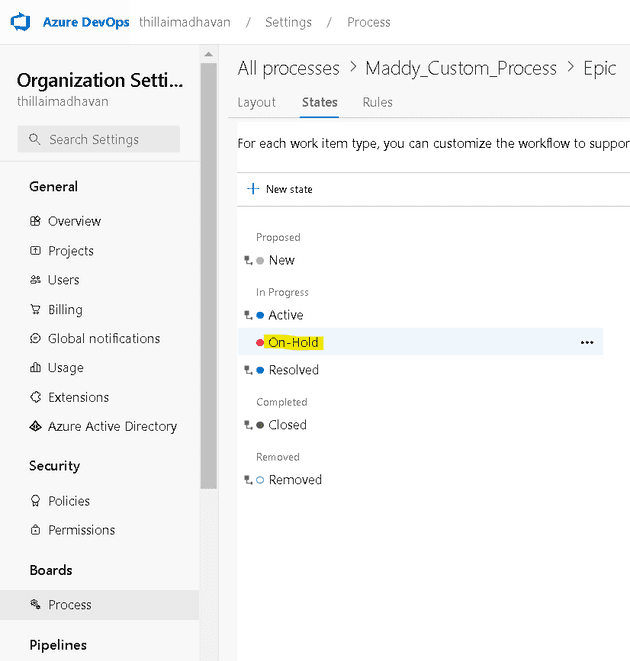
Now the "On-Hold" is placed between "Active" and "Resolved"
Customize the Layout:
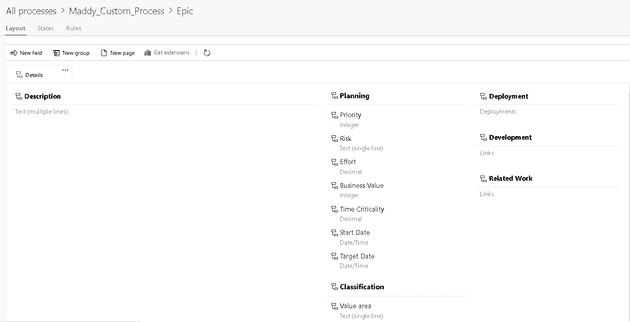
Navigate to the Layouts tab of the Epic work item
The Layout editor is a simple WYSIWYG(What You See is What You Get) editor
Here we can add or customize pages,groups, and fields
Custom Page:
Let's say we want to review the Epic once its implemented and document the lessons learned
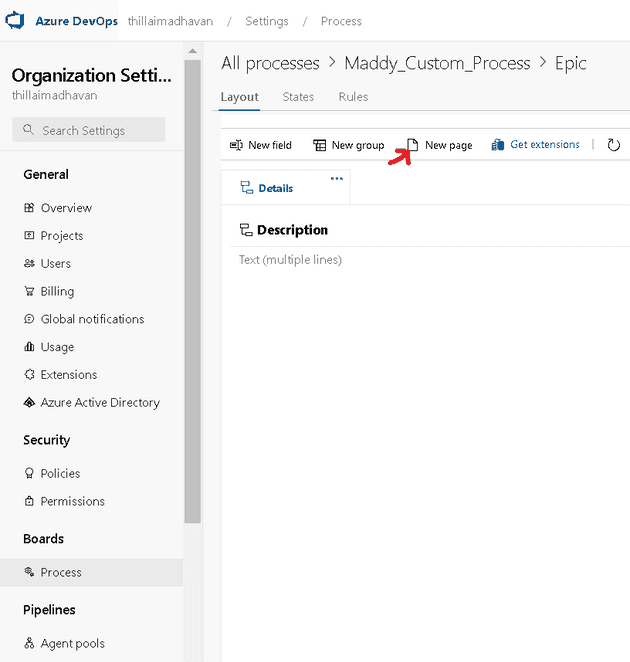
We will add a page called "Review" apart from the default "Details" page
Click on "New page" option
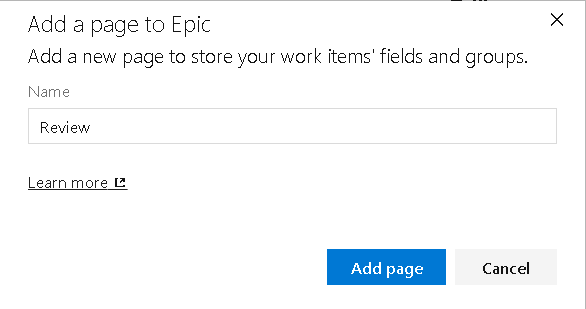
provide a name and select "Add page"
Custom Field:
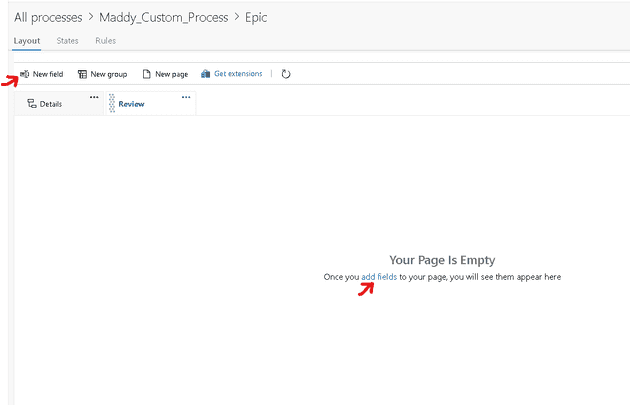
The Review page is now created but is empty
Click on "New field" or "add fields"
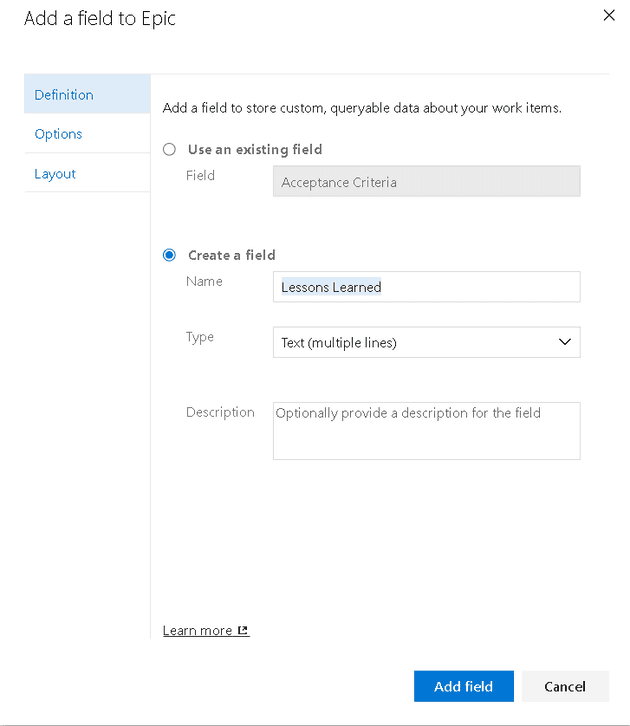
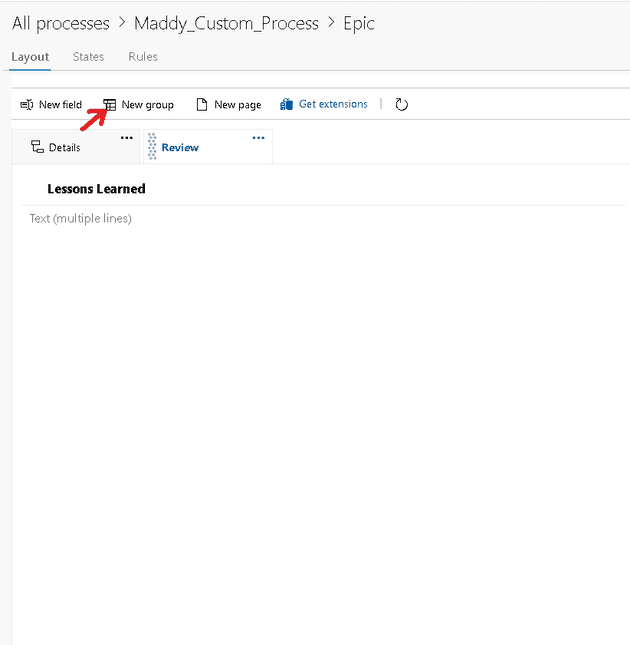
Let's add a field called "Lessons Learned" of type Text(multi lines)
The "Lessons Learned" field has been added to the Review page
Custom Group:
We will now navigate to the "Details" tab to add some custom groups
Let's say we want to record and track the approvals of different stakeholders in the Epic
Click on "New group"
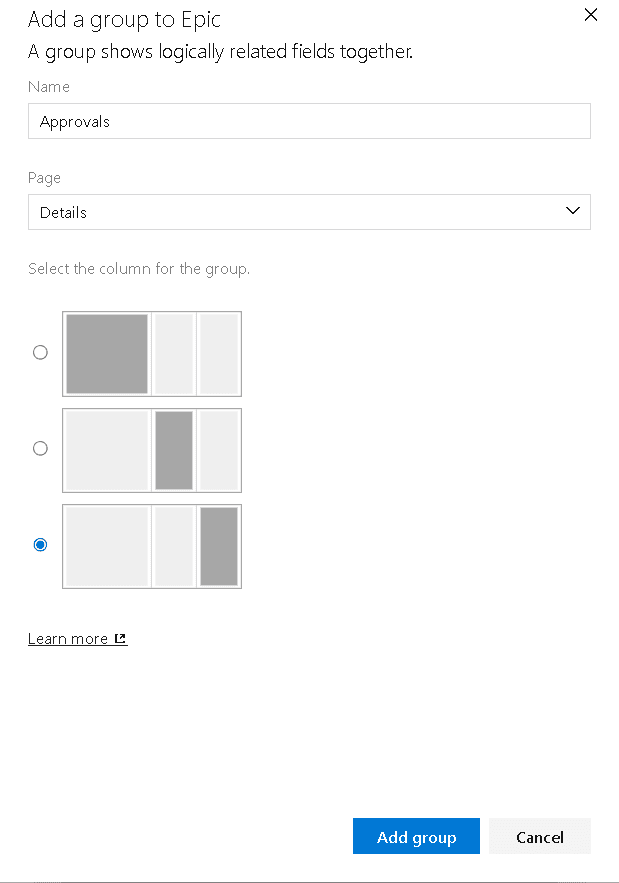
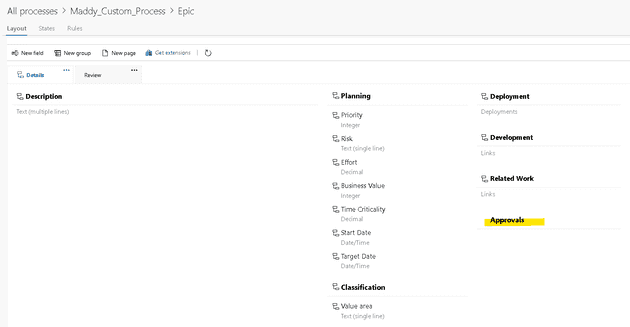
Name it "Approvals" and select a column
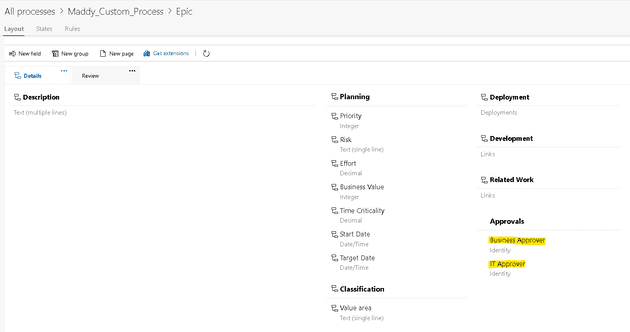
we will add two fields "Business Approver" and "IT Approver" to the Approvals group
Custom rules:
We discussed customizing the Layout and States of a workitem , we will now look into the process of adding custom rules
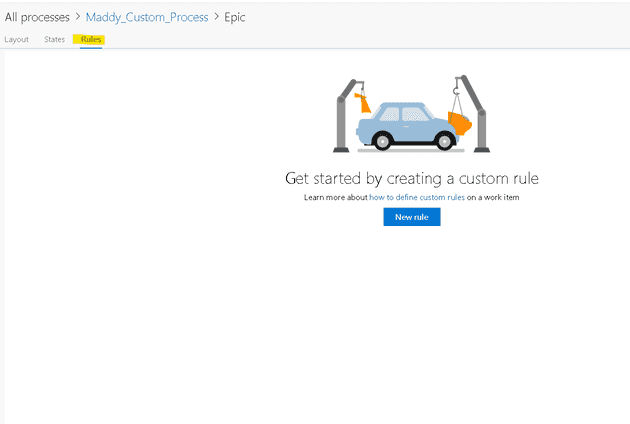
Navigate to the "Rules" tab
let's say that business approval is required before proceeding with the implementation of an Epic
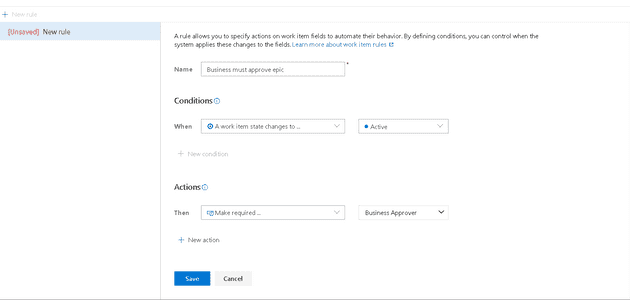
we will add a rule to make the "Business Approval" field mandatory if the state is changed to "Active"
click on "New Rule"
add the appropriate when and then condition as shown below
Here onwards if we change any Epic to Active state, "Business Approver" field will be mandated
Summary:
In this article, we have seen the various customization options in the Azure DevOps processes
next week, we will look into the best practices to be followed in azure devops processes
Thanks for reading, Good bye until next week!

