
In continuation to the previous article where we deep dived into Azure DevOps Microsoft-hosted agent, today - we will create a self-hosted agent
Create a self-hosted agent:
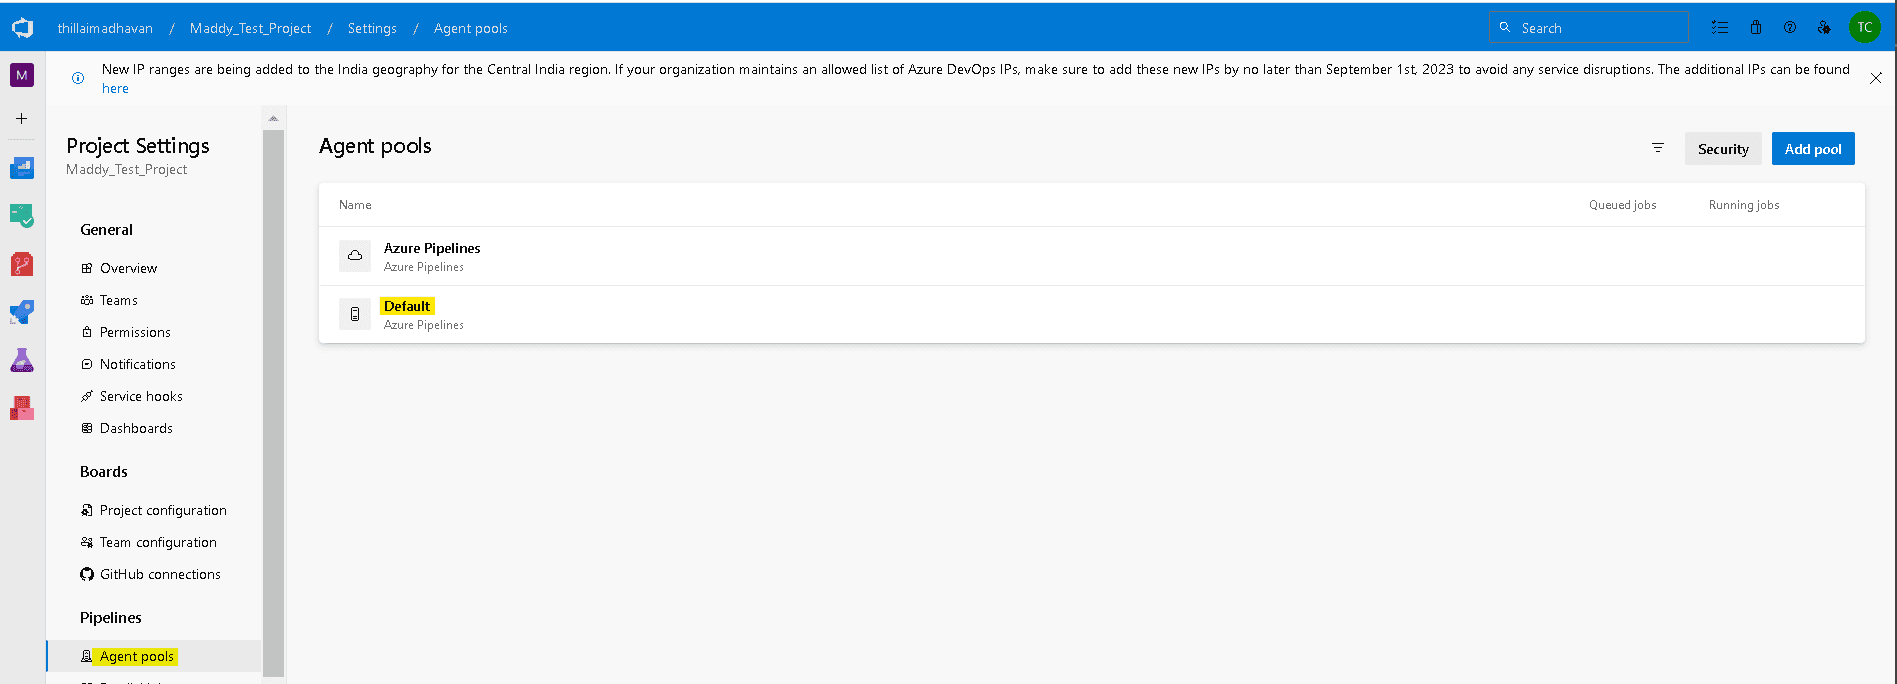
To create a self-hosted agent, go to Project Settings and then select Agent Pools.
Click on the "Default" pool
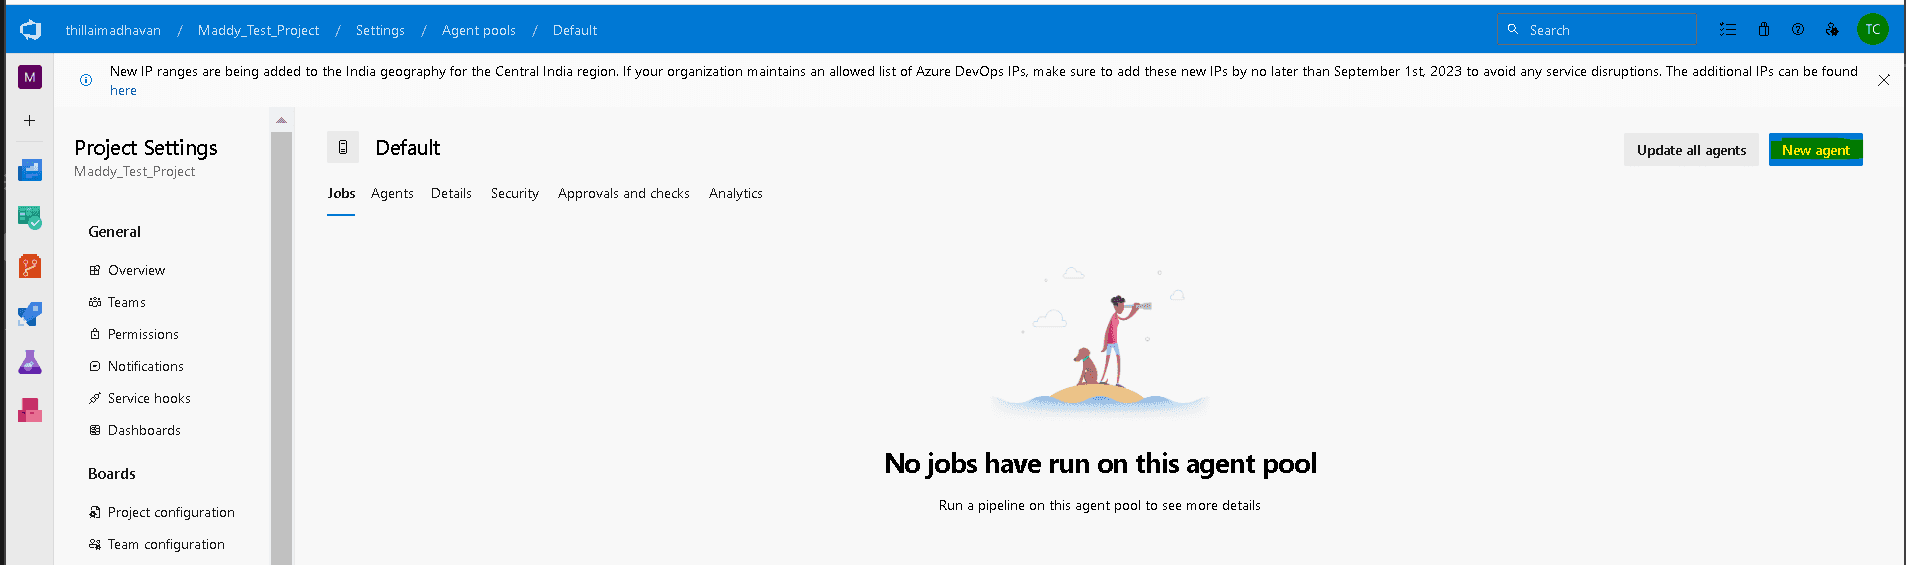
click on the New agent button
select the agent type - For this demo, we will use the Windows 64 bit agent
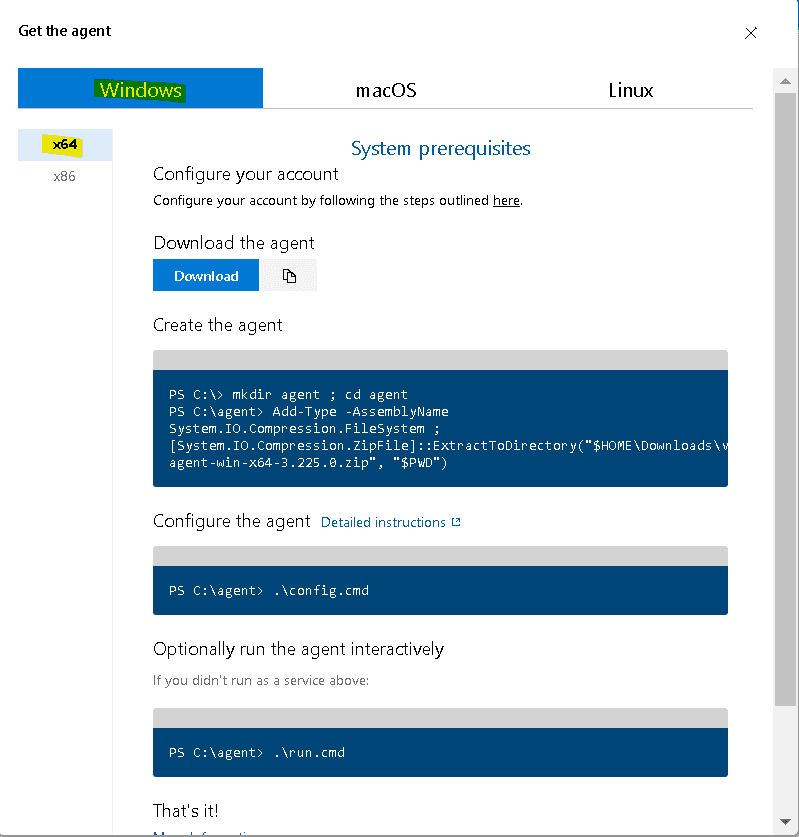
click Download, extract the zip file
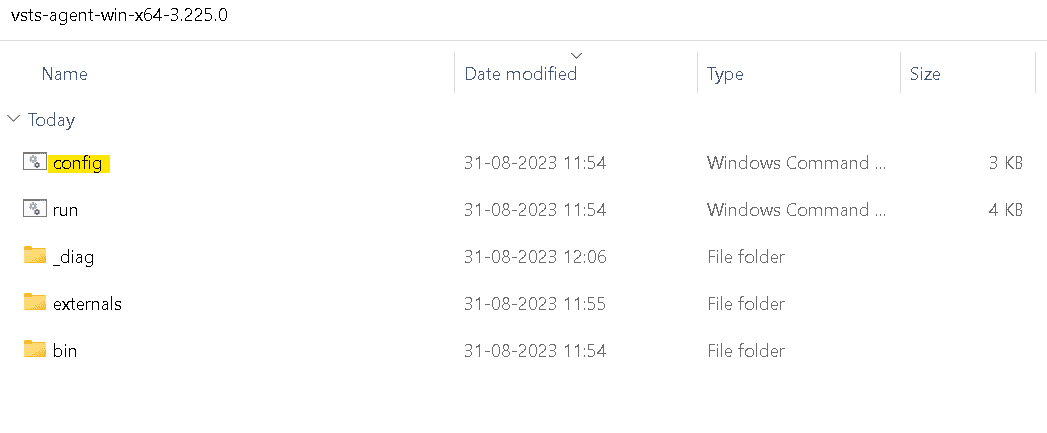
execute the config.cmd
Follow the instructions on the command prompt
we need to supply the organisation URL and Personal Access Token
If you have not already created a PAT , you can create one from the following screen
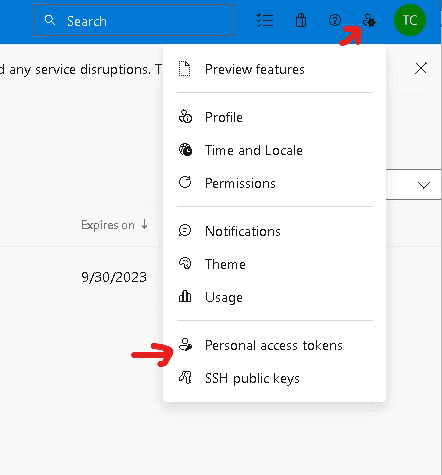
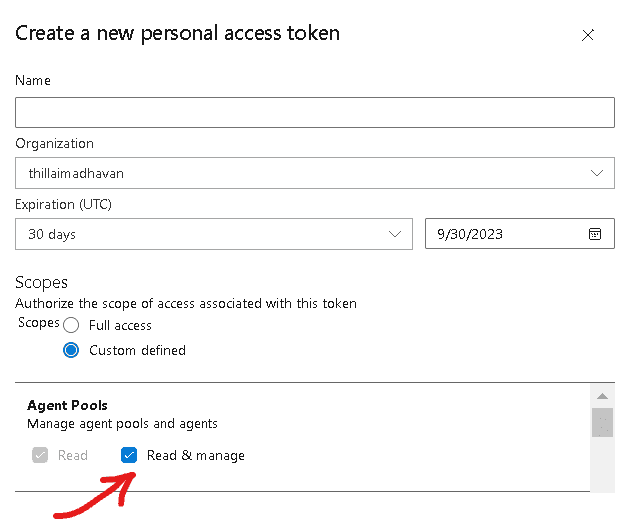
The PAT shold have "Read & manage" scope for the Agent Pools
Once the configuration is completed, we will be able to see the agent in the portal as given below
(For this demo we have used my laptop as an agent server)
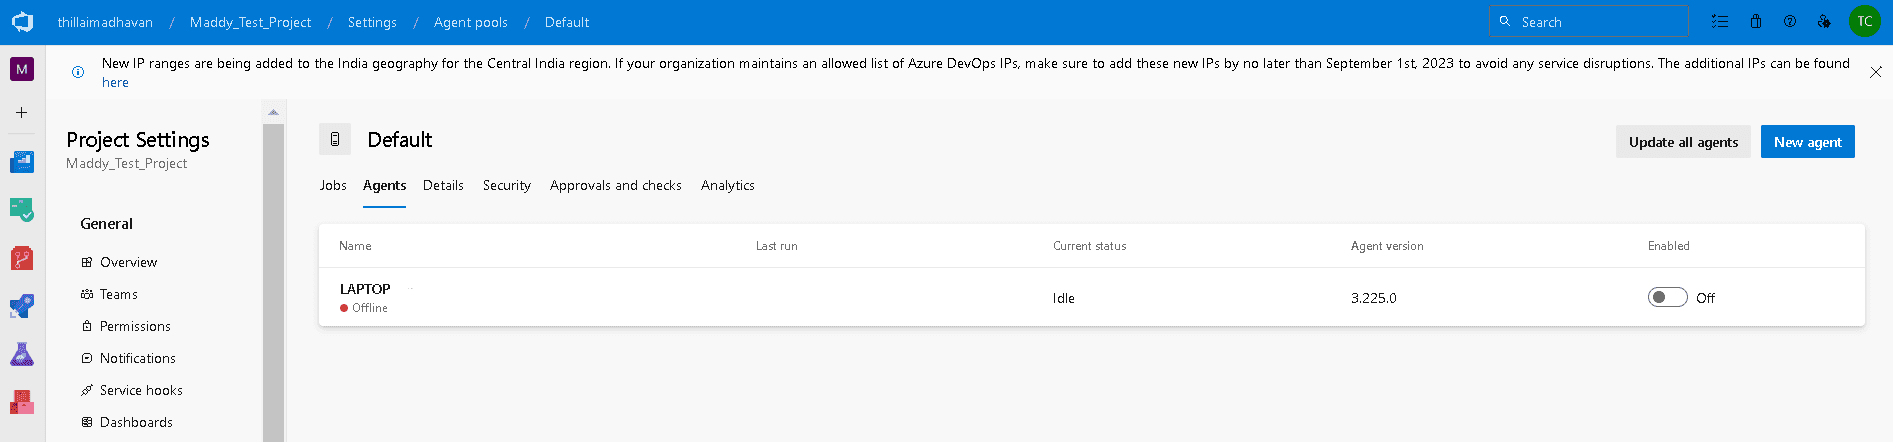
the agent might be offline, lets start it by executing run.cmd
When the agent is started successfully, the log should say "Listening for Jobs"
C:\Users\abc>C:\Users\abc\vsts-agent-win-x64-3.225.0\run.cmd
Scanning for tool capabilities.
Connecting to the server.
2023-08-31 06:48:17Z: Listening for Jobs
In the portal, we can see that the agent is online
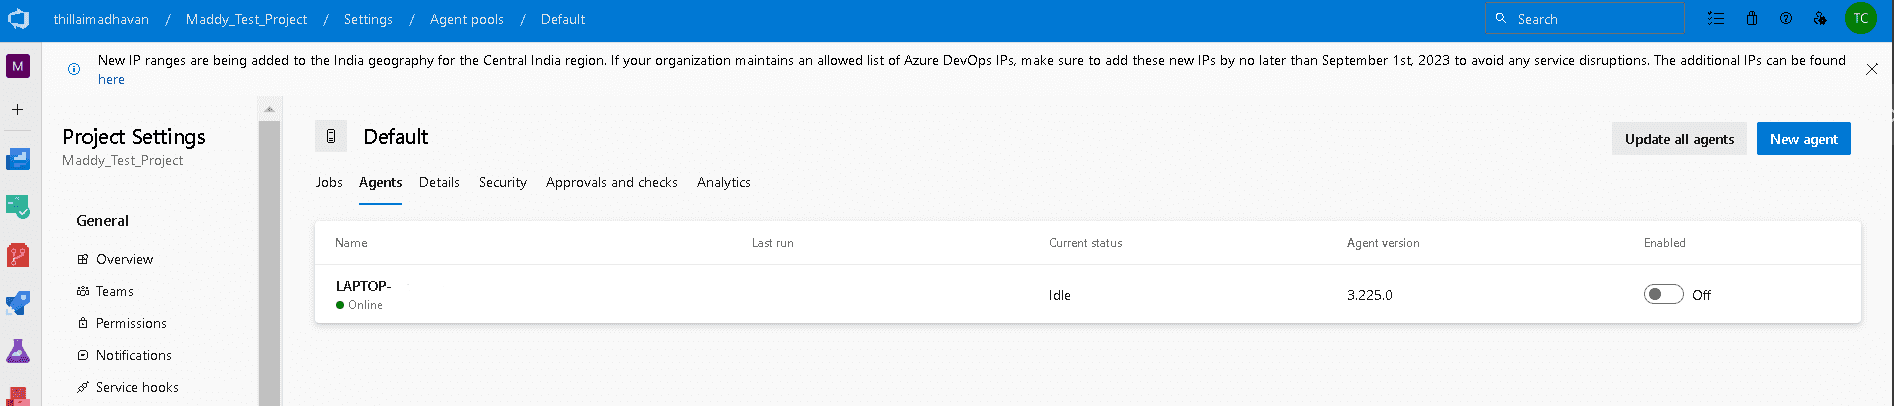
Summary:
We created a simple-self hosted agent, in the upcoming article, we will see more in detail about intenal working and maintenance activities for Azure Devops self-hosted agents
Thanks for reading, Goodbye until next week!